I May Have A Canoe Building Addiction!!!
By: Mike Burns
Is ‘Canoe Building Addiction’ a thing?
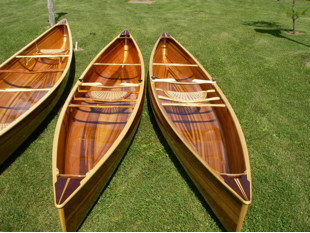
“Why don’t you sell some of your canoes?” Good question. My wife says, “Just sell one!”, but I can’t! From the start of the building process to using them on trips all over Ontario, each canoe means something to me.
I started my first canoe back in 2006 after seeing a friend’s cedar stripper for the first time being loaded up on an Algonquin Outfitters shuttle boat on Lake Opeongo in Algonquin Park. I was in awe. I drilled my friend with many questions about his canoe for the next 3 days. I’m making one!
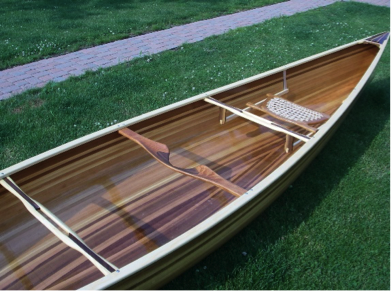
I purchased the plans for the same canoe, since I loved the style of this solo canoe. It was a Swift model designed by Martin Step called an Osprey. Many hours were spent going over the designs and reading a canoe building book called CanoeCraft by Ted Moore.
The time came and the winter build began.
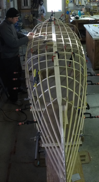
I drove to Toronto in October (while on route for a canoe trip) and picked out 17 foot long Western Red Cedar planks for the hull and Ash for gunnels and thwarts. My mold stations were cut out and placed on a permanent canoe strong-back screwed to the floor in my workshop. I then purchased router bits to make bead & coves on ¼” X .625” wide cedar strips.
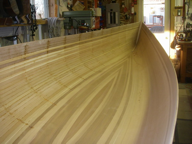
I decided to make the canoe staple-less, meaning, when the strips were placed on the mold stations, there would be no staples holding the strips in place. No little holes to be seen. Strips were held in place while the glue set using homemade fixtures, bungee cords, straps, and clamps. This takes longer, but I was in no hurry. I had all winter. As time went on, the canoe hull slowly began to take shape, until one day it actually looked like an upside down canoe.
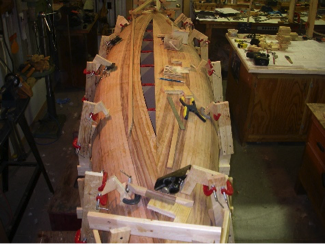
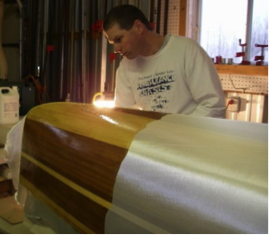
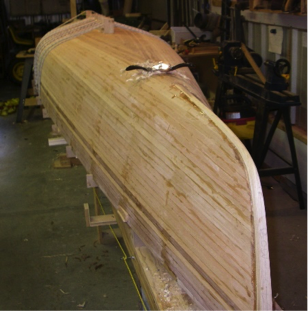
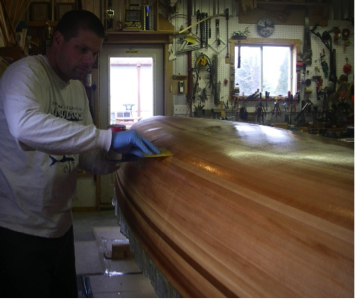
Next, I had to sand the outer hull until smooth, followed by the stressful step of laying epoxy over the cloth. No mistakes can be made mixing and applying the 3 coats and timing is essential between coats. I managed to get help from my wife applying the epoxy. Once the epoxy set over the course of a week, I would sand it smooth once again.
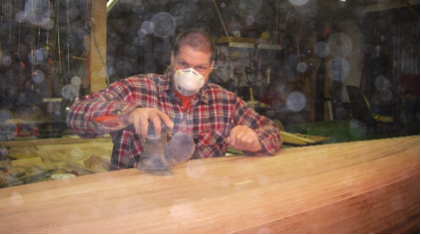
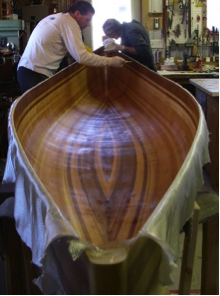
Taking the canoe off the mold stations to work on the inside was very exciting. Seeing the hull free standing was rewarding. Just like the outside of the hull, I had to sand the inside smooth and lay epoxy and cloth to finish it off.
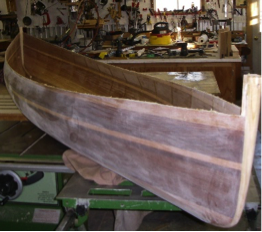
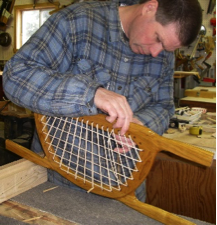
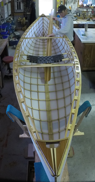
The gunnels were next to be installed, with detailed decks, contoured thwarts, and custom made seats woven with natural cane. I made a removable yoke for the portage trips to come.

Three coats of marine varnish were applied to finish the canoe off.
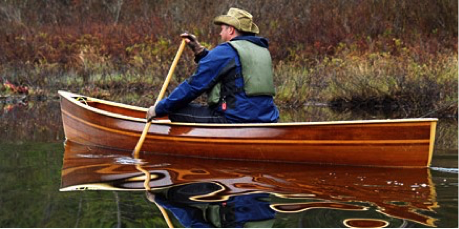
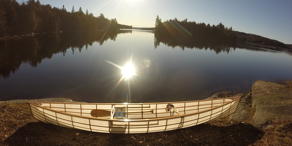
My finished canoe had it’s maiden voyage in a small pond in my yard in May and then proudly taken on the Ausable River in the Pinery Provincial Park on Canada Day weekend.
I figured I spent over 250 hours making this canoe. Final weight was 50lbs, darn it!…. I wanted 40lbs.
———-
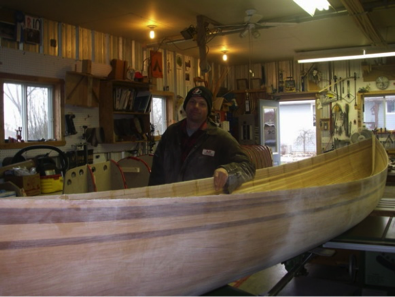
As winter approached I thought it was time to make another canoe. A tandem canoe would be my next choice, so I purchased plans for a Winisk 18 foot canoe.
This time I ordered longer wood from a Toronto lumber supplier. The first step in my new 2009 winter project started with making my strong-back longer to accommodate a 3 foot longer canoe. This canoe hull was easier to construct, but the longer lengths of wood was a pain to deal with in my shop.
I made the bow seat adjustable and the same style of seat as in my Osprey with natural woven cane. I tried to get my wife to help me weave “her” seat, but that did not go over well. It is a 3 hour job.
This canoe came in at 57lbs and has been used on multiple trips in places such as Algonquin and Killarney Provincial Parks. After being used so many times, I had to re-cane the bow seat, again with natural cane. Next time I will use artificial cane once I run out.
———-
My 2010 canoe project was another Osprey solo canoe. The objective this time was to make it lighter and make a sliding adjustable seat. To help accomplish this goal, I used thinner cedar strips, 3/16” thick instead of ¼” and cut back one layer of epoxy on the inside hull. The final weight came in at 43 1/2lbs. Better! Perhaps I could have save 2 lbs without make a sliding seat, but being able to level out the canoe due to gear, dog and weather conditions, was worth it.

———-
Wow, 7 years passed without another canoe build, until I saw a different style of canoe.
I was in Algonquin Park for Canada’s 150th with Derek Specht in June 2017. Canoe builder Jon from Backcountry Custom Canoes had a display of his Skin-on-Frame canoes at Canoe Lake. I was fascinated with the construction of them. Later that year, I decided I was going try building one.
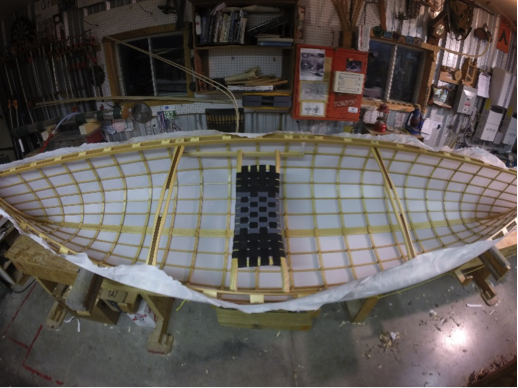
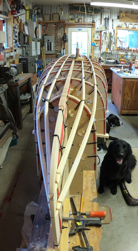
Doing some research online, I found some plans to make a Skin-on-Frame canoe. It was a Snowshoe Explorer, 14 feet long, covered with Dacron. The ordered kit comes with cloth and adhesive tape to fasten cloth to the gunnels. Making these canoes are fairly basic. Steam bent ash ribs are placed inside of well-placed Douglas fir stringers. Intersections of the ribs and stringers are held together with artificial sinew. Not sure how many hours I spent tying up the over 260 intersections, but was a good chunk of the time!
I custom made a sliding seat and place small decks to tie in the frame nicely. Little handles and thwarts also help stiffen the frame. Varnishing up the frame took some time with a brush, but it’s the best way to get coverage. Dacron, once used on airplane wings, is draped over the hull and held in place along the gunnels with heat sensitive tape. An iron is used carefully over the cloth to shrink the polyester cloth tight on the frame. Water base varnish is then used to water proof the cloth with 3 coats.
I installed some floor boards using left over cedar strips. These were not really needed, but it makes it nice to kneel on.
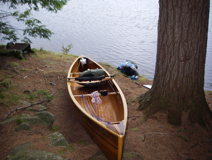
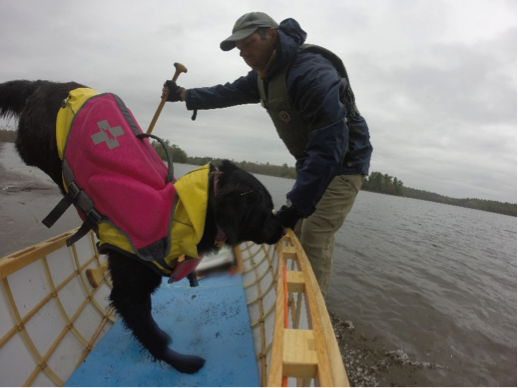
I used this canoe in Massasauga Provincial Park in May 2018. She was a joy to portage at 34lbs. I was a bit concerned that my dog’s claws would puncture the cloth so I placed a dense foam sleeping pad in the bow for her to lay on and protect my hull.
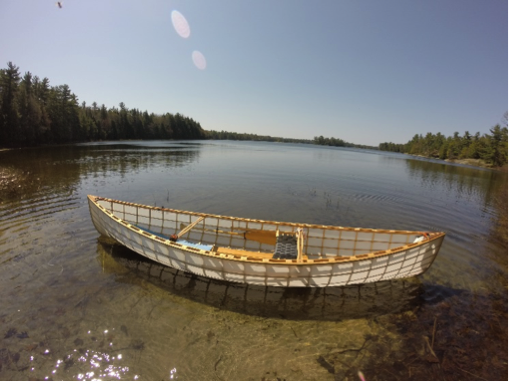
This was a fun build, but a few things I did not like about the design. It was too wide to be a solo boat at 36”. It sat up to high over the water line catching wind too easily. I now call it my fu-fu canoe. I wore out the cloth in several places. The delicate fabric had to be patched on an island in Georgian Bay during my trip, using clear duct tape. Good thing I carry a repair kit with me! I want to hang this canoe up in the house and put a light inside it, but again, was shot down by my wife. So, if making a tripping canoe, do not use Dacron. Even if you baby it like I do, it will rupture at some point. Lesson learned. I can re-skin it easily though, but on to another canoe……
———-
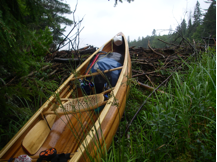
Skin-on-Frame canoe #2 for winter 2019. Custom made this time using Ballistic Nylon, a much tougher material. The goal this time was a narrow, 16 foot tripping canoe, low in height with a sliding adjustable seat, a must with my dog. Oh ya, wanted it to be under 40lbs once again…
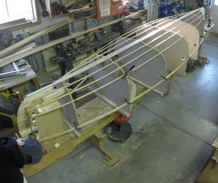
Ash ribs were spaced farther apart, steamed and dried on the mold stations. Douglas fir stringers were made a bit thicker to compensate for farther apart ribs.
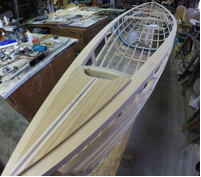
My gunnels mortised to hold rib ends in place. This was a pain in the butt to do! Never again.
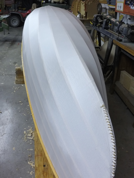
Less intersections to lash together was nice and made for a much faster build this time around. A new style curved seat was made from Ash and webbed with polyester from Fabric Land. The yoke was carved from some Pine and Ash leftovers. After 3 coats of varnish, it was time to install the Ballistic Nylon. Ends to be sewn to length, stretched on, stapled to the gunnels and shrunk to fit. A 2 part polyurethane seals the cloth with 3 coats. The outer gunnels were installed on top of the cloth, hiding the staples.

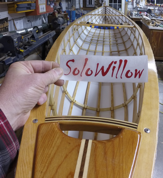
Custom made “SoloWillow” decals were put on, named after my tripping dog, and after ice-out in May 2019, my new canoe was used in Algonquin Park for a week.
This canoe was a dream to use and not bad to portage at 41lbs. I hit several rocks that Willow did not inform me of. I need to train her on that! Hardly any signs of the “slide overs”. Love this canoe…… a success!!!
———-
So, here I am this summer of 2019 working on SoloWillow2. Why? That ‘Under 40 pound’ goal thing. I’m changing stringers to Spruce, making ribs thinner and changing up the gunnels. Perhaps a stationary seat to beat my goal.
Time will tell! Perhaps I need some help with my addiction, perhaps not. I think it is a healthy one to have.
Mike Burns